Tag Archives: DIY

Simple Changing Table

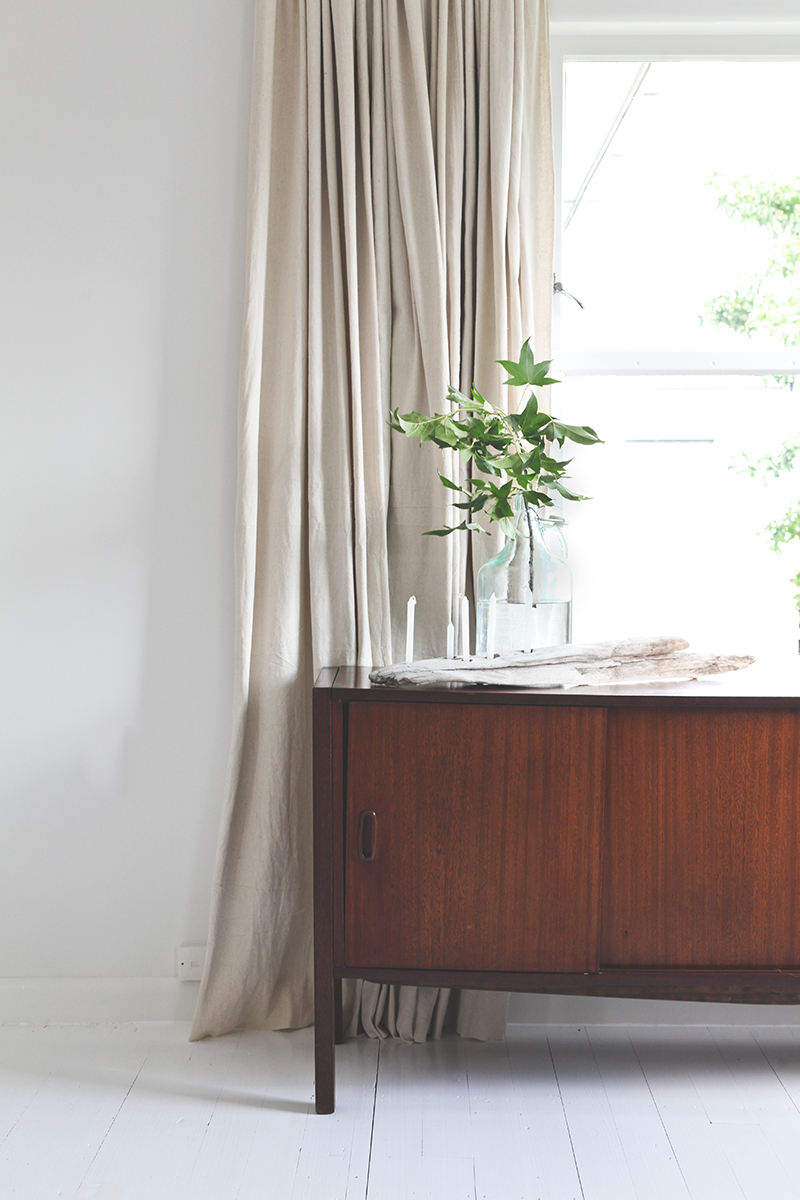
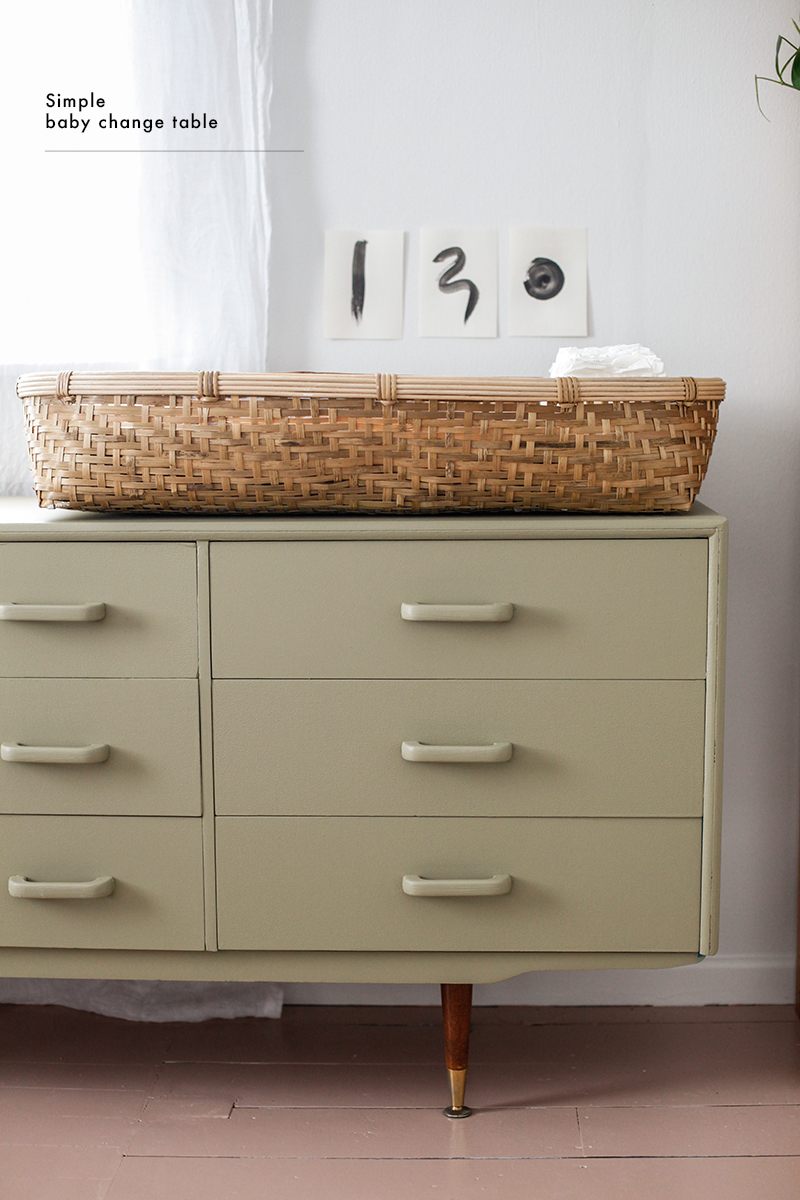
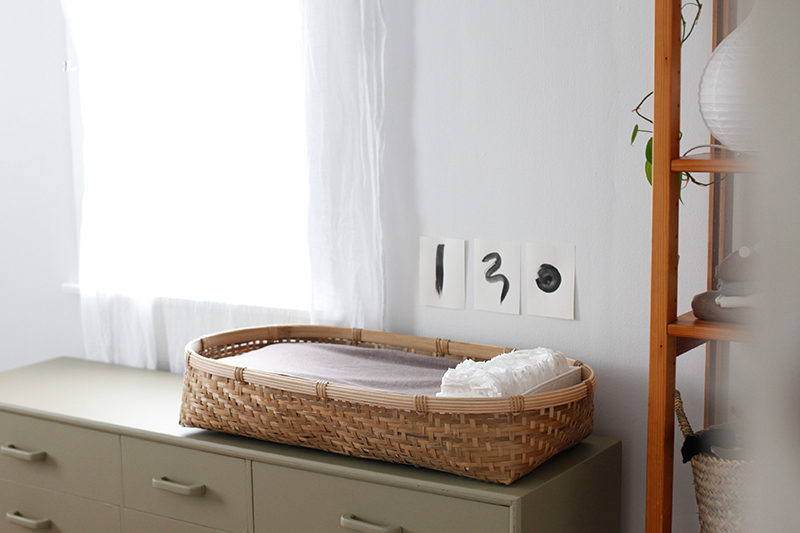
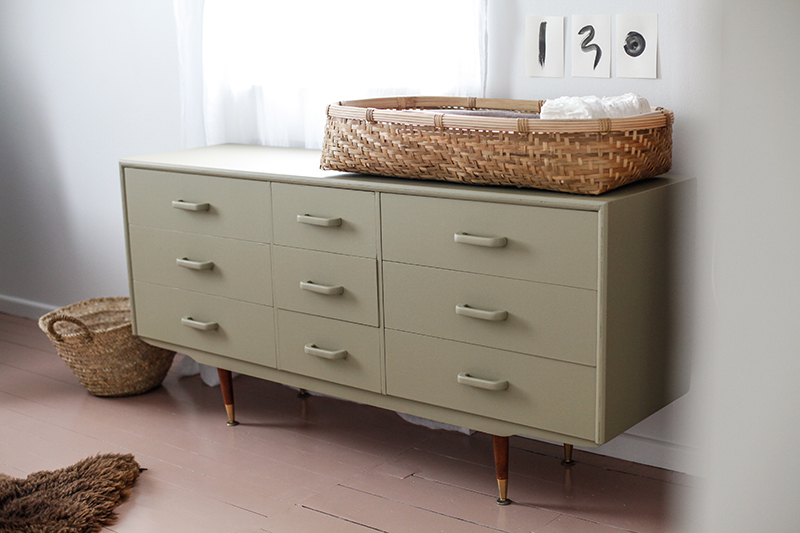
Floor in Resene Rascal, walls in Resene Black White, and change table in Resene Clay Creek | Linen drapes from Ezibuy, Monochromatic prints made by me, Sheepskin, basket on floor and change pad cover from Blackbird Goods, Change basket from Citta, Drawers from Trade Me.

Okay, so I know the previous post I said I was taking a break, buuuuuut here I am. Although I have been on maternity leave since Christmas, It has only really been in the last week I have had the chance to potter and enjoy the last days before babe, yes single digits now, well, until the due date anyway, so really, who knows! We have been getting the babes room ready, and feel grateful to have the time and space to actually get it done, amongst the more pressing renovations, ! And while I wont be sharing the whole space just yet, I wanted to share my latest project, mostly because of the response I got when I posted about it on my Instagram story.

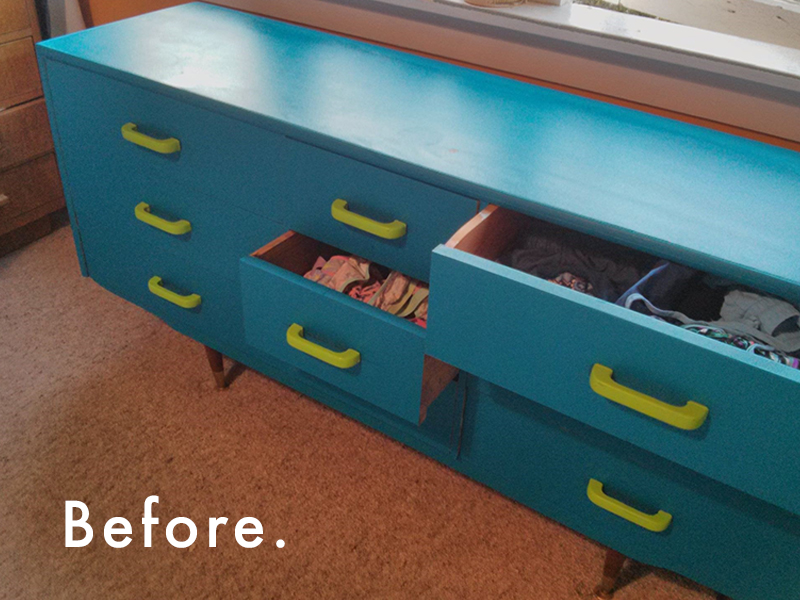
So, change tables, I debated for a while of even having one, but realised I would at least need somewhere to store little clothes etc. So started my search for a versatile, non baby looking change table, that would grow and change with the babe and her needs. And with no luck, I decided it was time to do a little DIY. I scoured Trade Me, and found that blue and lime green ( sheesh ) little number locally. It was the perfect size, simple style, and of course the right price, coming in at a grand total of $80.00. I then went about choosing my paint colour and landed on Resene Clay Creek, a muted and muddied green which I paired with my Resene Rascal floors ( *Quick Tip, when painting floors use Resene Sureseal as a pre paint sealer, stops wood stains and pigments coming through – although get someone else to apply it if you are pregnant, as that stuff is oil based and potent!)

Next up I had to work out how I wanted to use it as a change table. Seeing as I wanted it to change with our soon to arrive child, I wanted something that was easily adaptable and not just have a single use. I decided on a low basket from Citta, my thoughts being this will make a great little toy or blanket storage in the future, then used a natural latex pillow with a pillow protector and Dehei jersey cotton pillow case that I nabbed from our shop. Last but not least I popped an IKEA organiser in, for those bits and pieces.

And done! A movable changing basket and adaptable piece of furniture, tick, tick tick. Now we just need the babe!

x

Lounge | Before & After, and finding the perfect standing lamp

IMG_4573 copyGem-007web _MG_1100 _MG_1092 IMG_9484 IMG_9538

That beautiful capture of the pooch Frankie Blossom and I was snapped by the ever incredible photographer and gal pal Heather Liddell. All other photos by Blackbird.

Artwork by Blackbird | Couch from Big Save | Tassel Cushion by Blackbird, | Tweed Cushion from Jamie Kay | Cream cushion old Country Road | Sheepskin from Lapco | Hide on floor from Lapco | Coffee Table by Blackbird & Co | Marble Vase old Country Road | Candle by Curio Noir | Shibori Cushion by Blackbird | Day bed refurbished by Blackbird & Co, covered in fabric from The Fabric Store | Cane chair vintage, Thrift store find | Grey Rug, vintage off Trade Me | Leather Moroccan pouf from Let Liv | Rubi lamp from Let Liv | Linen Look curtains are DIY with Drop cloths from here  | Sideboard, vintage off Trade Me | Driftwood Candle holder by Blackbird

Nearly one year on, and it is incredible to stand back and see how much we have done, and how far we have come. With most of the major projects done, we have the hallway and spare room to go. Can you imagine, a finished house!?! Amazing.

So here it is, in all her white on white glory ( Sorry to all the unpainted wood fanatics,  she was a mess under there ) . We adore living in this space, even with a dirty pawed dog. The floors are in Resene white in Enamacryll gloss, which wipes up in no time. And the walls in my favourite Resene Black White. White on white really gives the most amazing canvas to display all your treasures on. 

Now for that lamp. After searching high and low and finding others too modern, too vintage, too small or big, I found her. Rubi, the standing lamp by leitmotiv from Let Liv. The perfect clean lines with a nod to mid century. Perfection. Tying in nicely with our absolute find of the year, the 5th Avenue couch in leather from Big Save

Yep, we are pretty chuffed with how she turned out, and we must’ve done something right cause we made the cover

You can read more about our lounge by grabbing a copy of the latest Homestyle Magazine

Until Next time

BlackbirdBLOG-signature

MAKE IT | shibori dip cushions

titleSHIBORIDIPblackbird

Even as winter rolls in, I am loving this summer shade of indigo. Injecting a little colour into my otherwise neural house is as easy as some beautiful linen cushions and a little dye.

IMG_9183

Here is what you will need : Two linen cushion covers – I chose euro size from Citta Design, one packet of Blue Jeans by DYLON Fabric Dye, snips or scissors, salt, string, a couple of buckets and rubber gloves.

IMG_9186

Taking your pre washed cushion covers, simply bunch through the middle and tie firmly with your string. Note : Any gaps in the string will let the dye through, also the tighter you tie it, the less dye that penetrates.

IMG_9193

Next,  wet the covers and ring out. This will create more of a gradual line, a dry piece of fabric will have a far blunter transition.

steps

Follow the instructions on your particular dye packet to mix your dye.

Next,  dip half your cover and allow to soak for 45 minutes . At this stage you can push a little more of the cover under the dye, and soak for another 10 minutes. Lift out and leave them to hang over another bucket with the undyed end at the bottom. Gradually your dye will seep down, the longer you leave it, the more dye fades over the white. Make sure you dry somewhere out of the sun. DO NOT take the string off until the fabric is dry!

IMG_9691

And there you have it! Fresh summer cushion covers all year round!

Until next time

BlackbirdBLOG-signature

MAKE IT | pot holder

blackbirdblogPOTHOLDER

Nothing beats a simple afternoon project to kick off the year right. And I decided to start the year with new pot holders. I used this super simple tutorial from The Purl Bee, with a slight variation at the end.

You will need :

Cotton Fabric – Enough for two rectangles of 20cm wide by 33cm tall, per holder, I chose an indigo plain and stripe from The Fabric Store

Insul-lite – Enough for two rectangles of 20cm wide by 33cm tall, per holder, from Spotlight

Wool wadding – Enough for two rectangles of 20cm wide by 33cm tall, per holder, from Spotlight

Cotton Twill – Enough for 15cm length, per holder, from my local emporium

Needle and thread.

IMG_9632

First off, orient the cotton rectangle so that the long sides are vertical, the short sides are horizontal and the right side is facing up. Next fold the twill tape in half so that the two raw ends meet and there is a half twist in the tape, as shown above. Place the raw ends of the twill tape at the center of the top short side of the cotton rectangle. Place the wool rectangle, wrong side up, on top of the cotton rectangle, making sure that the twill tape stays in place. Then place the lining on top of these layers and pin all three layers together along all four edges. Using your machine’s walking foot and a 1cm seam allowance, sew all the layers together along both long sides and the top short side (including the twill tape), leaving the bottom short edge unsewn.

IMG_9636

 Turn the hot pad right sides out. The cotton will be on one side, the lining will be in the center, and the wool will be on the other side. Pin the bottom with the raw edges facing inward, and hand or machine sew the bottom closed. Then mark out where you want your stitching to be, I decided to machine sew mine in an X.

IMG_9639

IMG_9648

And you’re done!

Happy making!

Until next time,BlackbirdBLOG signature