Tag Archives: MAKE IT

MAKE IT | Rope basket diy

DIY rope basket BLACKBIRD BLOG

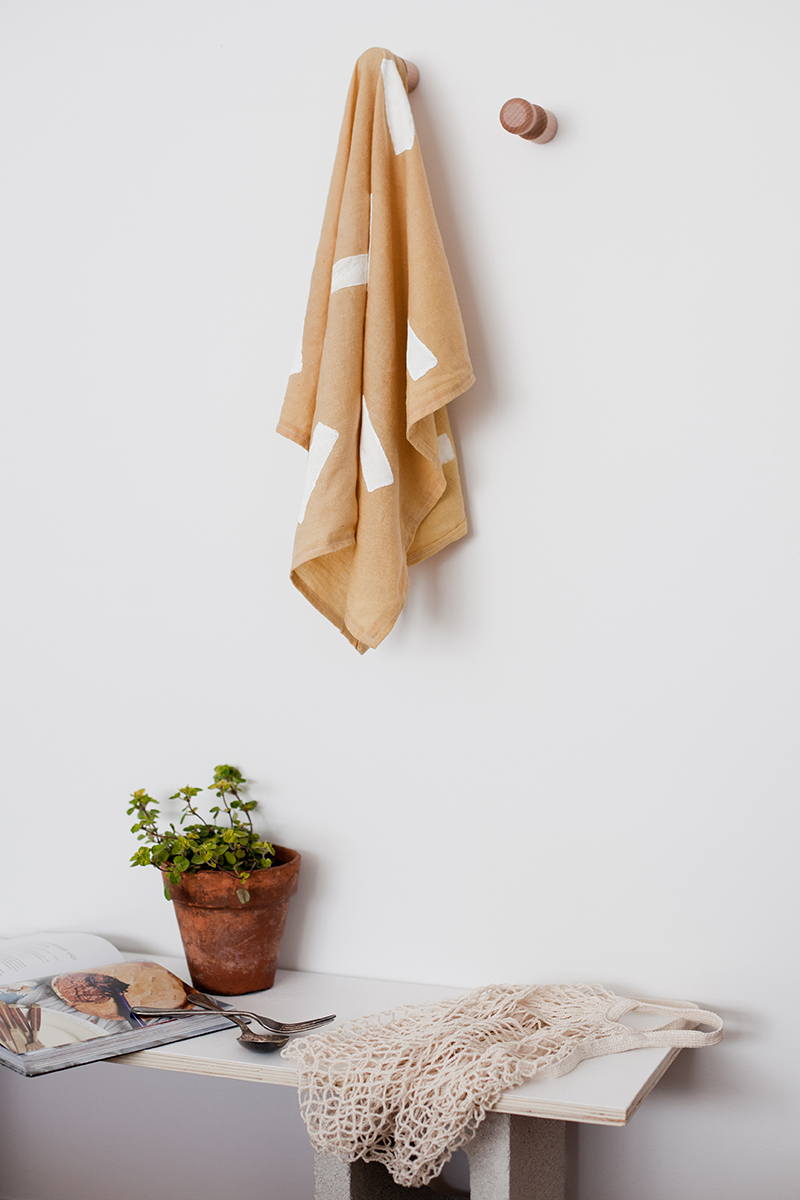
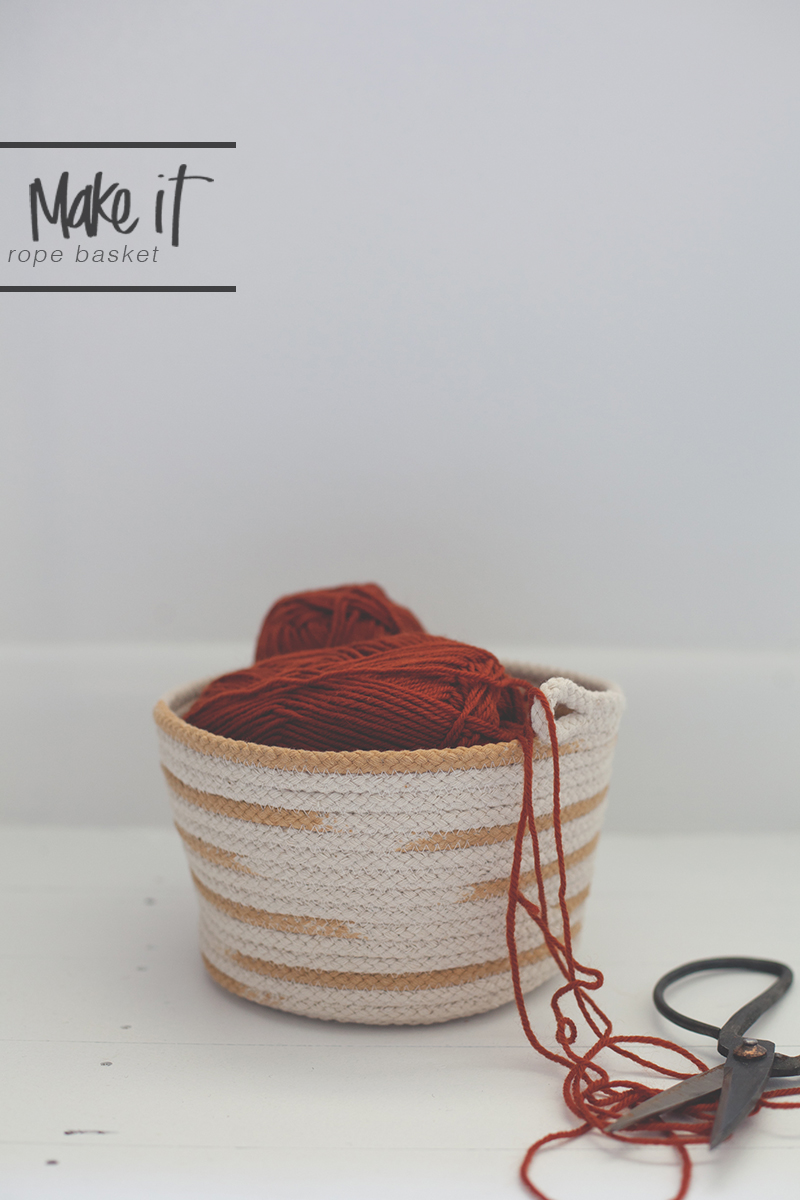
I am a storage enthusiast. A true advocate for ” A place for everything and everything in its place”. Maybe it comes from years on tour in cramped spaces, or living in open plan homes, or maybe I am just a little bit of a neat freak. Either way, storage and I are pals, and I am always on the look out for another kid to join the club.

Inspired by the talented and matching first name babe that is Gemma Patford I set out to make the perfect knitting basket!
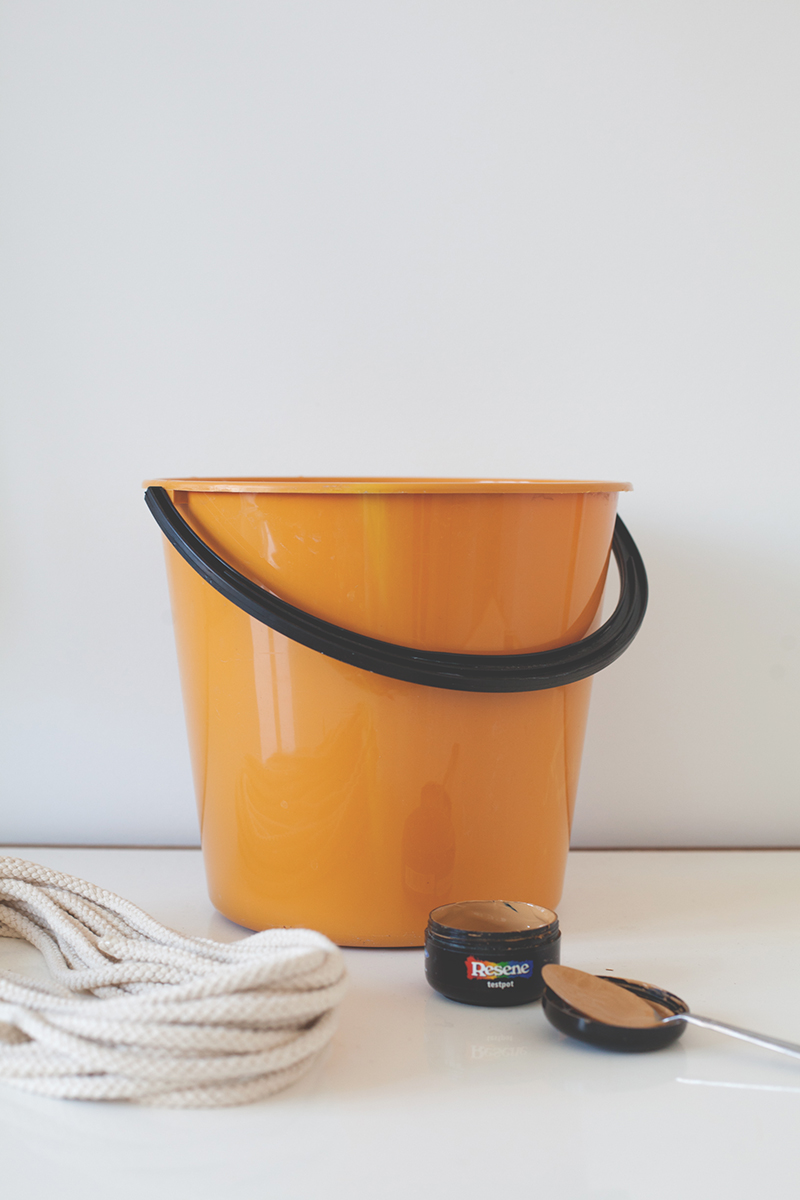
IMG_8981

You will need :

10m of rope ( my basket had a 190mm diameter )

2 tablespoons of acrylic paint ( I chose Mackenzie from Resene )

2 cups of water

A bucket

A masher, or some sort utensil to push the rope down with

Sewing machine and thread ( I chose to keep mine the same colour as the rope, but you can choose whatever you like! )

step one

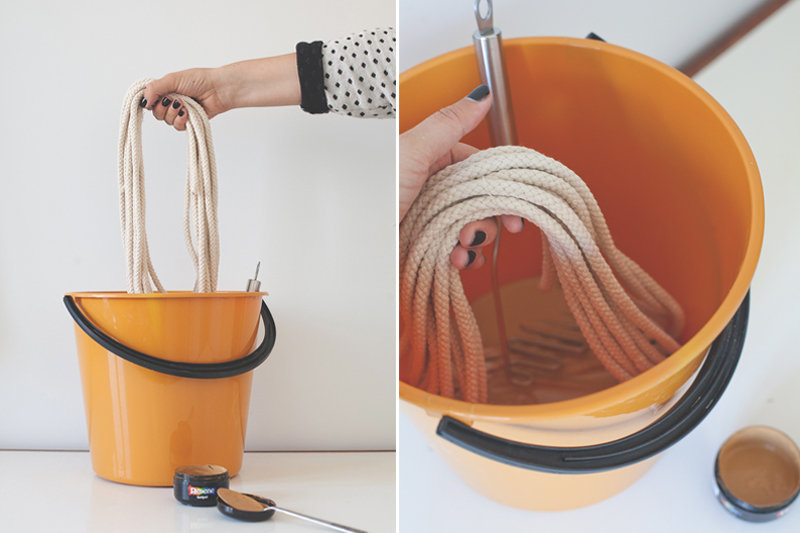
First, in your bucket mix the paint, two tablespoons of paint to 2 cups of water was the ratio I used, this way it absorbed but still had a dense colour. Next, loop your rope and dip into the bucket. Using your masher or other utensil,push down the rope so it is coated well. If you want crisp lines between the rope and paint you can always tape it.

IMG_8996

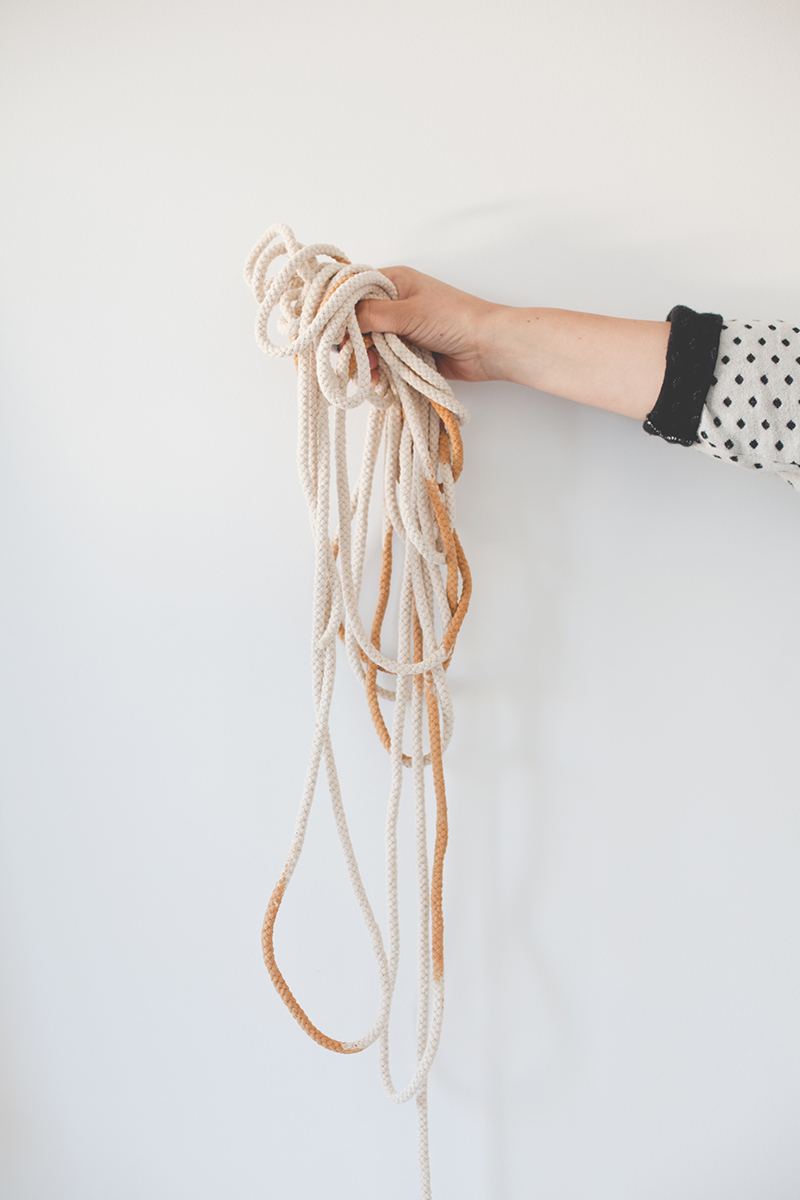
Squeeze out the excess water and paint mixture and hang it up on the line to dry, Make sure they are spaced out and don’t sit against each other. Once dry, your rope is ready to sew!

step three

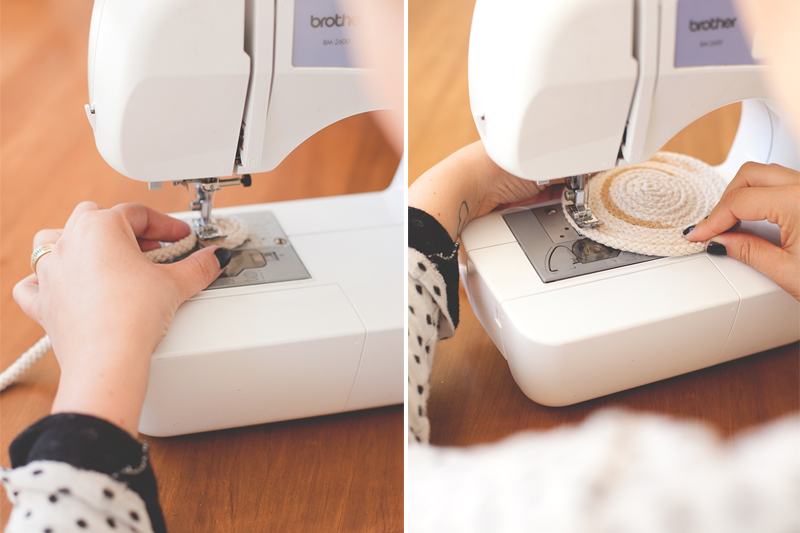
Set your machine to zig zag stitch. Starting with a small coil  begin to sew, I found at this stage it is easiest to use the hand control on the sewing machine as it difficult to push it through a turn. continue sewing until you have the desired  diameter of your vessles base, I made mine 150mm.

steps four

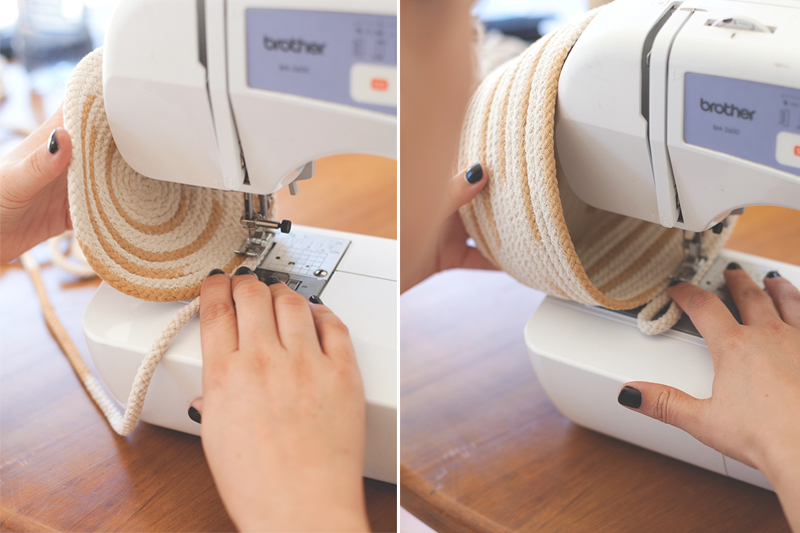
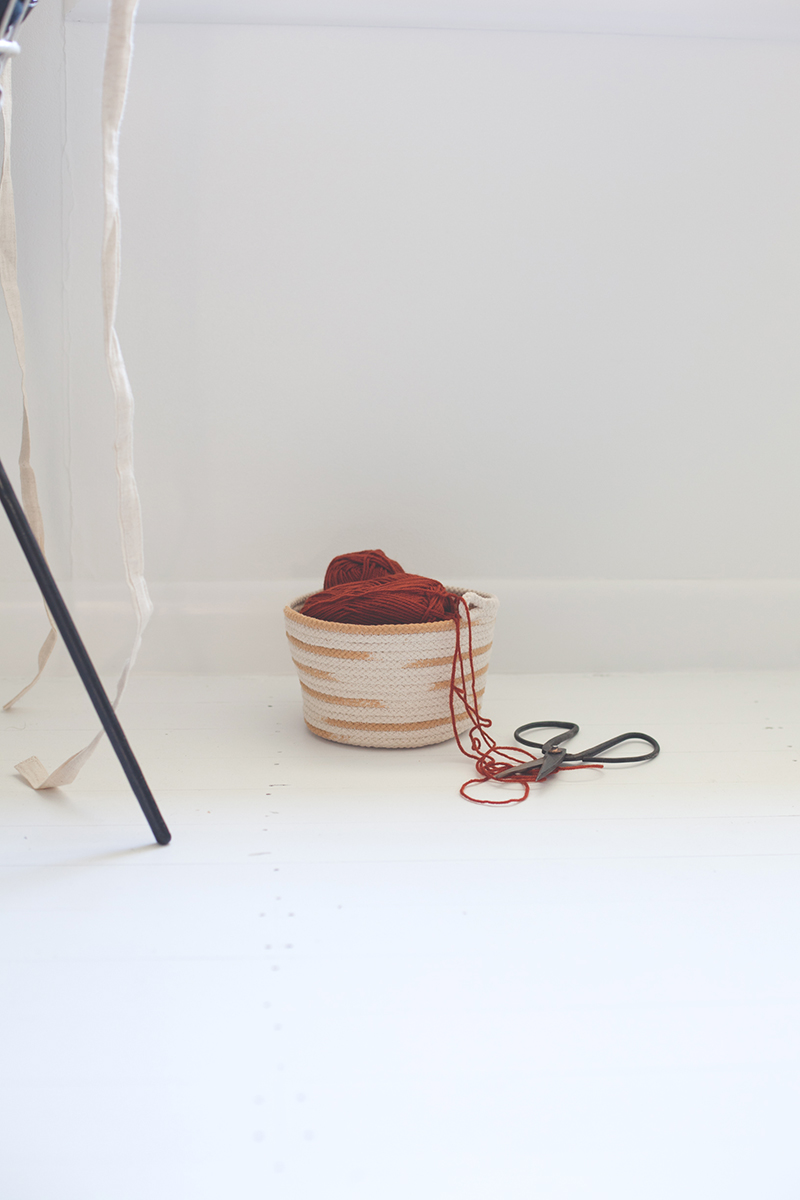
Next, Turn the base on a right angle ( the more angle you use, the more abrupt the sides will be ) continue to sew. Once you are a few centimeters from the end, loop the rope back under itself and sew to finish. Voile! You’re finished! Now fill with any of those bits and bobs then sit back and admire.

IMG_9034

Until next time,BlackbirdBLOG signature

MAKE IT/ fridge makeover

title
IMG_8904blackbirdblackboard2blackbirdblackboard

If you follow my instagram you would know that we are up to our eyeballs in renovations, and if you have renovated before you would know that before you know it the kitty is empty and you still have a lot to do ( even when you have watched every bloody penny ) so there is always room for fast, effective and cheap makeovers.

Here is mine on our old beast of a fridge.

First of all I need to diguse the not-so-cool retro exterior ( which, in my haste I failed to photograph ) think grey, cream and pink. ugh. Before I painted I gave it a thorough clean and then a light sand with wet and dry sandpaper. Then using Resene Blackboard paint I lathered on one coat, letting it dry, then applying another. ( Note: Don’t try to be a speed demon like me and not tape the edges, or it will result in messy little brush marks where you don’t want them )

With it finally dry, I had to decide on a little decorating of sort. After countless ideas and drawings I decided for our kitchen, it need simple and classic, enter the laurel. This time I slowed down a little and actually measured out where I wanted the laurel to sit and the writing to go. Still wanting to keep it hand finished I drew and wrote with CKS Window marker from Warehouse stationary.

For the finishing touches I needed somewhere to put my chalk, so I repurposed an old wood scrabble rack and blue tacked it to the side. Then super glued a small magnet to a bulldog clip to use as a handy docket, postcard or voucher holder!

All up this makeover was super fast, and pretty cost-effective too.

Until next time,BlackbirdBLOG signature

MAKE IT / vegetable dye & block print teatowel

pinterest2

Lately I have become re-obsessing with mustard.

It all started with a linen tee-shirt that I picked up on holiday. And as with all my obsessions it usually begins in the wardrobe and takes over the home, or vis versa really. But with the hunt for the perfect mustard linen escaping me at every turn, I decided to take matters into my own hands.

After countless hours scouring pinterest for guides to vegetable dyes and tapping into the knowledge of my mother I began, armed with turmeric, Onion, Teabags, salt, hot water and a large tub ( note, iron can change the effect of the dye, so best to use a good old plastic bucket )

IMG_8714 IMG_8731

Taking my cream linen from The Fabric Store I cut them into shape, 70cm by 50cm pressing and hemming the edges.

After a process of trial and error, I found that to create my perfect mustard I would need a concoction of 1/3 cup iodised salt, 1 teaspoon of turmeric, 30 teabags and 15 cups of boiling water. Mixing thoroughly, allowing 10 minutes to steep then leaving the tea towel completely submerged for 30 minutes, stirring occasionally. After wringing them out, leave them to dry ( Make sure you dry in the shade! The sun affects the final colour outcome )

Once dry it was time to wash, this is where it went a little down hill for me. After washing my tea towels and drying them again, I found my deliciously rich mustard had faded to a softer muted shadow of its former self. Sigh. But after a few curse words and another coffee they began to look better. Time to jazz them up a little.

one

Enter Das fabric paint in white and a block of wood ( pretty handy when you live in a construction zone ) I used the side to dip in the paint and press on the linen. Rocking it gently to get an even cover. Once again patience is a vertue. Wait for it to completely dry, then press with a hot iron on both sides for how long your particular paint tells you to.

IMG_8829

There you have it, beautiful linen tea towels in your very own shade and print! And my moral of the story for you is have patience, it goes a long way. Happy dyeing!

Until next time,BlackbirdBLOG signature

MADE // Linen Apron

linenapron2BLACKNIRDBLOGIMG_8611IMG_8655

Firstly, this is more of a show and tell than a DIY, there was a lot of ad-libbing that could get very confusing. But hopefully it inspires you to make your own!

I am a compulsive maker and forever bobbing around letting the craft tides move me to my new venture. The latest wave to hit is pottery. After attending my first class and being made to wear a plastic bib I was all like ” Oh hell no..” and quickly realised I was in need of a hard-wearing ( and cute ) apron. I had been drooling over the likes of these and these for far too long, it was time for action. Enter my pal’s over at The Fabric Store and some delicious oatmeal linen.

I used an apron that I already had to trace the pattern off, but if you don’t have one you can follow this simple pattern here ( that one is even adjustable! Faaaancy )

The prerequisites were a large pocket with a few compartments, tie in the front and a cute little knotty part. And because I am terrified of buttonholes, I decided to simply sew one end of the neck tie of the front and knot to cover it. Sneaky huh.

I do hope you are inspired to make your own! Or could just go and buy this beauty seeing as I haven’t been terribly helpful with the DIY.

Until next time,BlackbirdBLOG signature