

It’s true. I love Christmas. Every year the tree is up on the 1st December and I begin preparing around October. But it’s not all love and mistletoe. I love the festivity, the celebration, the gatherering and the chance to decorate and wrapping presents ( Seriously, put me in a room with paper, ribbon and empty boxes, I will wrap them. And love it. ). But I am not a fan of the frill, red, white and green, the stress and the need for mass consumption. So this year I am getting back to basics, buying purposefully, and trying to strip it back. Beginning with this centrepiece.
Realistically this is something you could use at any point in the year, it’s simple, understated, doesn’t scream HO HO HO and suuuuuper easy to make. Here’s how.
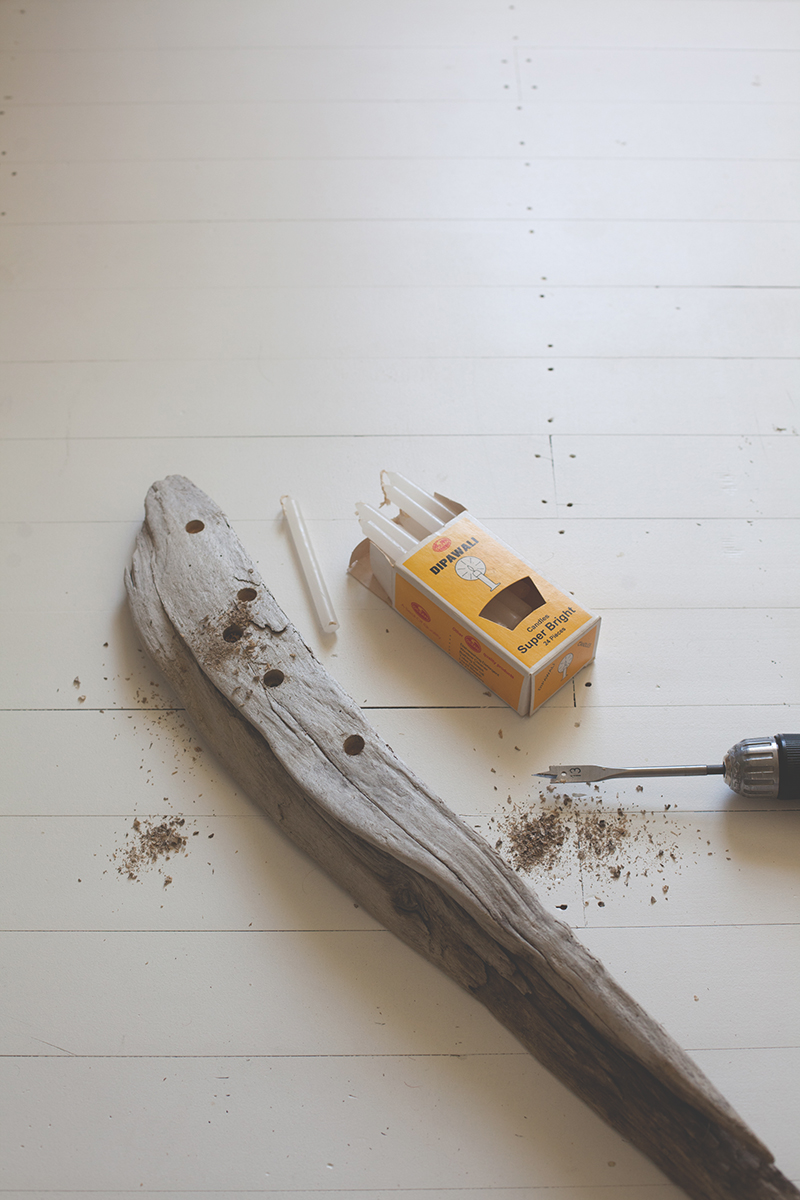
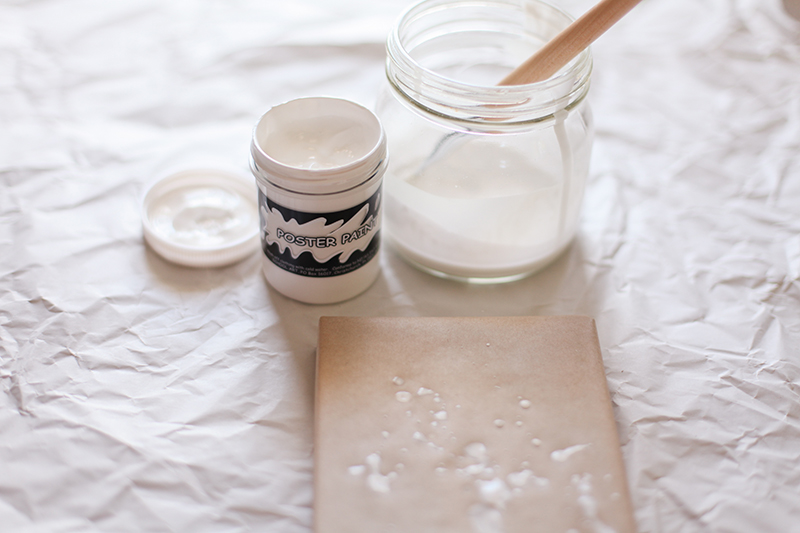
YOU WILL NEED :
– Driftwood, or any other wood for that matter, as long as it can sit and not roll over
– Drill
– Appropriate sized drill bit, you want this to be ever so slightly larger than the candle you are using.
– Candles, mine were found in a thrift store, but you can pick similar candles up at your local emporium.
– Pencil and Blutack
METHOD :
Decide where you want your candles, I chose a random pattern, but you can pick whatever you like. Mark with a pencil indent.
Take your drill with the appopriate sized drill bit ( or get a handy someone to help you )
Drill slowly, straight down. The hole should be around an inch, or around 3cm down. Clean out the saw dust.
Put a small ball of blutack on the bottom of your candle and place in the hole, press firmly.
Done! ( told you it was easy )
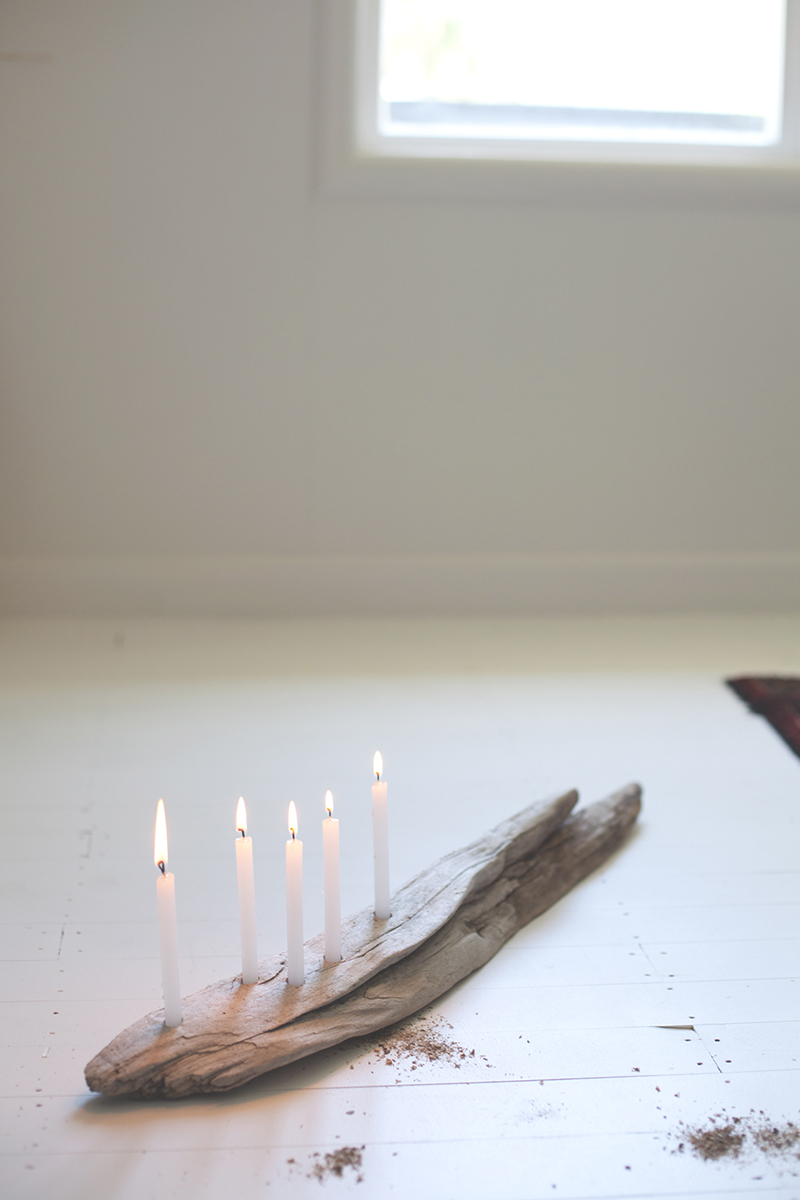
Here is to a simple, low cost, low impact Christmas.
Until next time,


 Okay, Lets start at the start…..updates happening this week, starting with an Island Christmas.
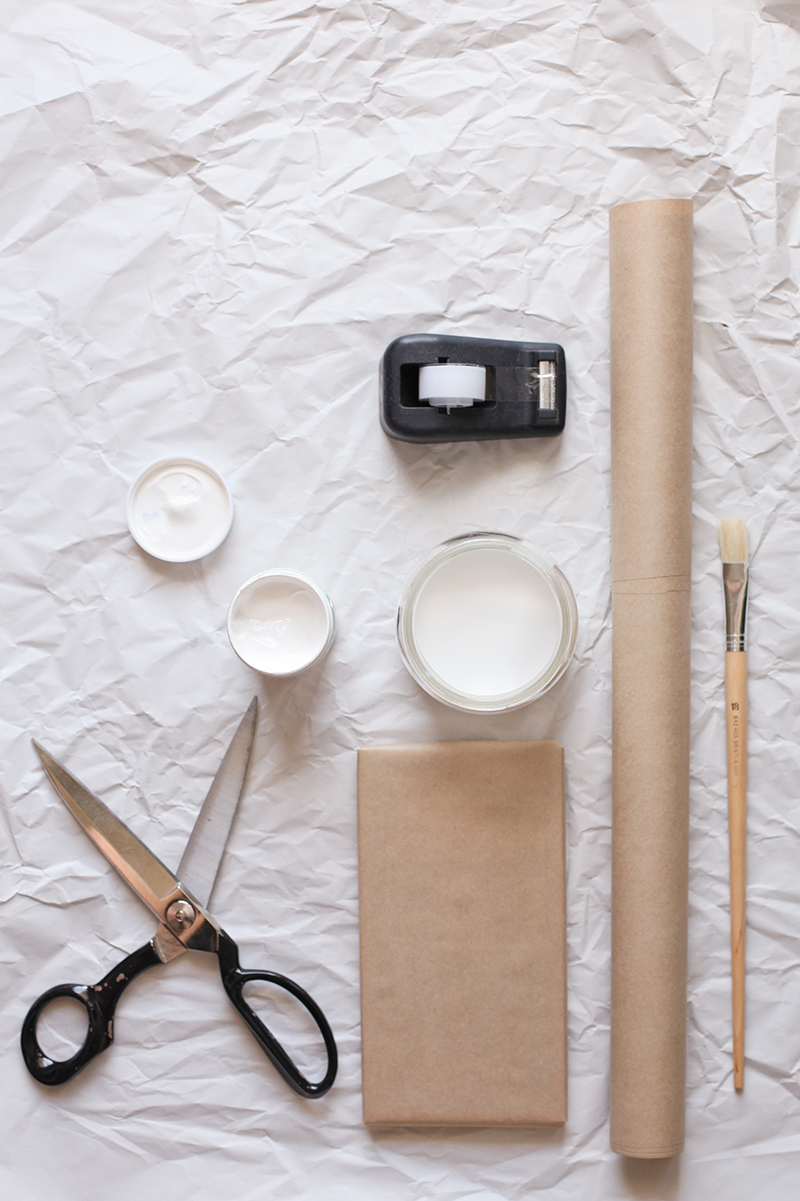
 One of my FAVOURITE things in life is wrapping presents.